
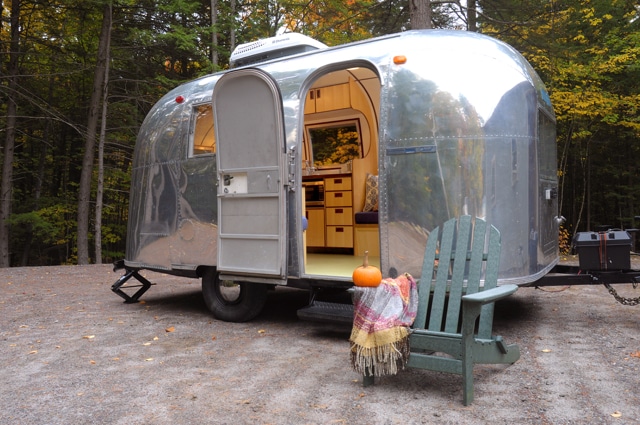
Occasionally a project comes along that is so unlike anything you have done before that you are left to wonder if it is even something you should take on, or if you will come to regret it down the line. This is how I felt on a sunny August day when a 1966 Airstream Caravel trailer was towed into the shop. The project scope seemed quite straightforward on paper; create an interior space that could function as an office, a reading sanctuary and a guest bedroom for the clients summer home on lake Winnipisake. But as I came to learn through the course of this project — designing and building around the convoluted compound curves of the classic Airstream’s contours was anything but simple.
Airstream History
The first Airstreams were built in California in the late 1930’s, but soon WW II brought aluminum shortages and made travel a luxury few could afford. It wasn’t until the post war boom that increased wealth and leisure time, coupled with the recently completed interstate highway system, created the perfect nexus for road travel, and the Airstream trailer with it’s sleek lines and futuristic look was there to fill that niche. By the 1960’s, the silver trailer was so cemented in the American psyche that when NASA needed a mobile quarantine unit for astronauts returning from moon missions (presumably infected with space germs), they turned to the Airstream company, who would eventually build 4 of the specialized trailers at it’s Jackson Center Ohio plant. Given the iconic status of The Airstream, I knew that I had to get the details of this project right.
My Design Process
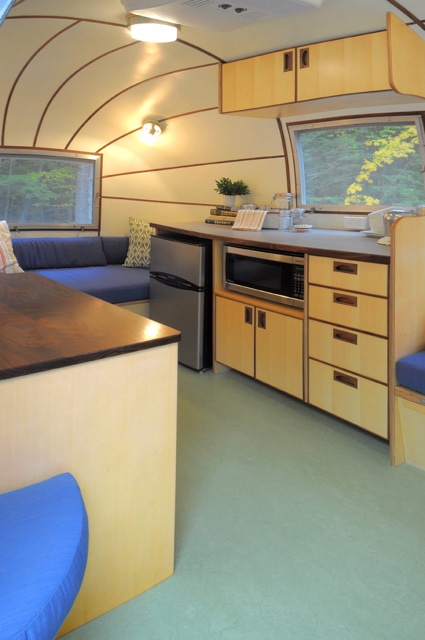
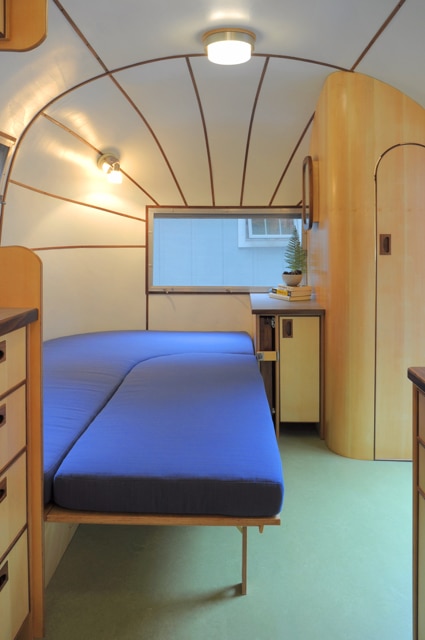
When I received the trailer it was an intimidatingly blank slate consisting only of an empty aluminum skin and a new 3/4” plywood floor. Before I could even start the construction of new cabinetry, a floor-plan had to be developed that incorporated all of the elements the clients were hoping to have in the new interior. From discussions we had, I knew that they wanted a storage closet, a banquette that would fold out into a double bed, a desk, a prep area that would include a microwave oven and a mini fridge, and sleeping accommodations for one more person. Quite a lot to squeeze elegantly into a 17’ trailer!
For this phase of the project I enlisted the help of My friend Aimee Brothers of Lavender and Lotus Interior Design. I had collaborated with her in the past and I knew that her keen design sense would be invaluable when it came to working out the details of the layout. I especially wanted her input to insure that the color schemes of the flooring, walls and fabrics worked in harmony. Together we came up with a layout that incorporated all of the elements the clients were hoping to achieve, whilst retaining a sense of openness and flow through the small space.
Constructing the Inside of the Airstream
With the design phase mostly completed it was time to start considering how to construct the walls. Originally I had hoped that I would be able to find either an aftermarket fiberglass wall kit or work with a boat builder to fabricate new wall panels to fit the signature curved ends of the Airstream. Unfortunately both of these ideas ended up being dead ends, so I spent the time to figure out how to do it with the one medium I am most comfortable with – wood. After some experimenting, I discovered that I would be able to follow the compound curves using wedges of 1/8” bending poplar to mimic the same technique that was used for the aluminum skin on the exterior of the trailer. Instead of the 7 panels used for the metal though, I went with 11 panels.
I had my plan in place but before I could get started, I still needed to have the rough wiring done and fabricate some curved studs that the wall panels would be attached to. Wiring – easy enough (completed by Chris Ward of Ward Electric), curved studs – less so. After a lot of experimentation, I settled on a technique of building laminated studs in place, using the curves of the trailer as the mold. The hardest part of this technique was fixing the first layer of 3/8” bending ply to the underside of the aluminum skin, which I was able to do using a combination of polyurethane glue and a hot melt glue to hold the piece in place as the poly glue set. Once the first layer was secure, it was easy enough to glue and screw subsequent layers to the first, until the stud reached the required thickness.
Studs and wiring complete, and with a layer of fiberglass insulation in place, it was time to tackle the laborious process of scribing, cutting, and attaching the wall panels. There ultimately wasn’t any secret technique to this process, just lots of patience and time with a pencil and bandsaw. Once this was finished I could finally start thinking about the fun stuff – the built in cabinetry.
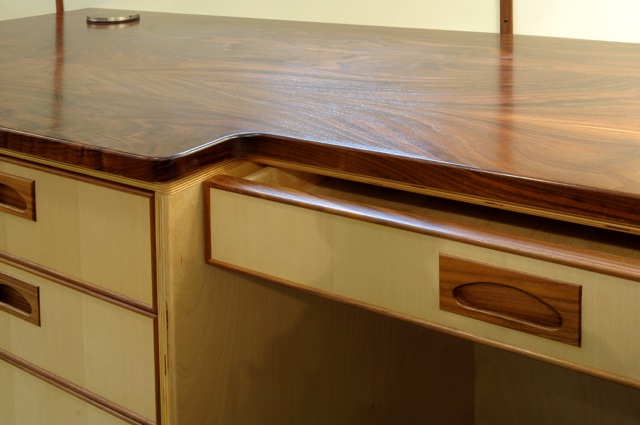
For the cabinetry we settled on a baltic birch plywood construction with sycamore veneer and walnut trim. The client really liked the look of the exposed laminations on the edge of the Baltic birch plywood which provided a cool retro look and made my life a lot easier too! I warmed up by first building the two relatively simple cabinets that would be the prep kitchen area and the writing desk. Other than the large scribes needed to fit the curved walls and accommodating the wheel wells, both pieces were relatively straight forward. Once they were complete, it was time to move on to bigger and better things.
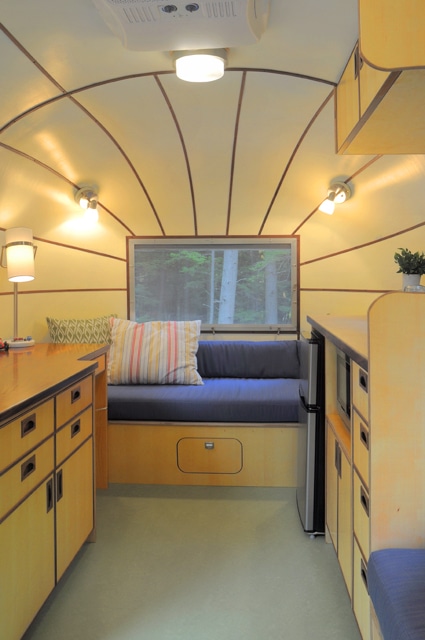
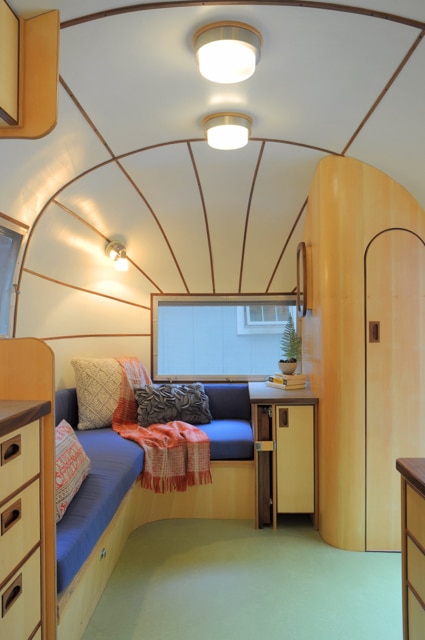
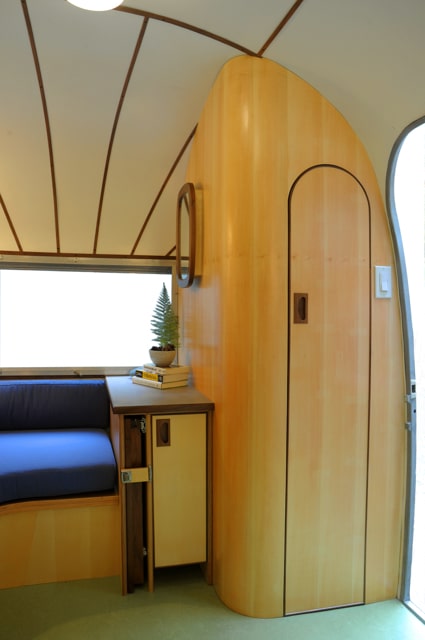
One of my goals in designing the interior, was to mimic the curves of the shell as much as possible in the cabinetry. There would be curved cutouts in the partitions and rounded doors in the storage bins, but to really get the full effect there would need to be curves in the cabinetry too. I had done a fair amount of bent lamination work in the past and I was eager to put my skills to the test here. I designed the banquette and also a built in bench seat with conical curves in them. But the show piece would be the curved closet corner that would be scribed into the compound curves of the Airstream’s ceiling and walls. At seven feet tall, the single piece corner would be the largest lamination I had ever attempted, so I decided to dive right in and start there.
As I have discussed in previous articles for the Journal, all bent laminations start with a mold, and this one would require a big one. Because I needed to be able to slide the mold and the work piece in and out of the vacuum bag with relative ease, I decided to build it with less ribbing than usual to reduce the overall weight. Luckily I did I dry run with just the mold in the bag as this turned out to be a big mistake! The light weight construction of the form was no match for the forces of the vacuum system, and the whole thing imploded inside the bag. Oh well, so much for lightweight! My next iteration of the form was more rugged and held up inside the press.
The next problem to overcome was ensuring that the pressure of the bag on the work piece was evenly distributed across the surface. This was necessary because the outer layer of my closet corner would be a piece of sycamore veneer. If the pressure was not evenly applied, I could end up with air pockets on the surface where the veneer was not sufficiently pressed into the glue layer. After some experimentation, I settled on a combination of an 1/8” piece of plywood used as a caul and a layer of 1/4” quilt batting that would act as a breather fabric between the caul and the bag and would allow air to flow over the surface as the bag was pulled tight. To ease the stress of the glue-up I opted to use Unibond 800 as the adhesive which gave me plenty of open time to work with, and I made sure there was an extra person in the shop in case things got hairy and I needed a hand.
All of the prep work, experimentation and dry runs payed off and I was able to achieve the bend on the first attempt. Further proof that woodworking is 90% preparation and 10% execution. As is true for most things in life I imagine.
The conical pieces I needed for the bench and banquette were relatively easy by comparison. Rather than a typical bent lamination which is a section of a cylinder, these pieces would be a section of a cone, so correct layout of the mold was critical. I drew out the form full-scale to determine the size and placement of the ribs in order to achieve the correct angle. The beveled ribs were cut on a band saw with the table tipped at the necessary angle. Once the mold was built, the rest of the process was the same as any other bent lamination, although I opted to give myself a few extra inches of material on either side of the angle so that I could creep up on the final size.
From here on out, most of the rest of the furnishings would need to built in place with some sections being constructed at the bench and then scribed into the curves of the Airstream and installed. The technique I developed over this part of the project consisted of using 1/4” MDF as template stock, a pair of scribes, and many trips between the band saw, spindle sander, and edge belt sander. Once I had the scribe perfect, I would transfer it to whatever piece I was working on using a trim router and a flush cut bit with the bearing riding on the template I had just created. Slowly in this manner, the interior cabinetry began to take shape. First the closet, then the banquette and day bed, and finally the small conical bench. The same scribing technique would be used to get a perfect fit on the prep cabinet counter and the desk top.
There were some head-scratching engineering challenges along the way — how to get a bed with square corners to fold away into a space that is round for example — but eventually everything was in place and I could pay attention to the cosmetic details of doors, drawers and a small vanity mirror for the sleeping area.
To keep the sleek, modern look of the trailer I decided on flat doors and drawers with vertical grain veneer and a small walnut bead to cover the edge of the baltic birch plywood substrate and provide a contrast to the sycamore. I also wanted to use shop made walnut pulls. I felt it was important for the pulls to be flat to reduce the chance that someone may catch themselves on one while moving around the small space. I chose to make them similar in style to a set I had developed for a recently complete jewelry cabinet. They would be inset with a cutout for your fingers. Instead of a round hole as I had done for the cabinet, I once again looked to the Airstream for inspiration and created an elliptical shape reminiscent of the elegant curves of the Airstream’s ceiling.
One of the things I have learned over the years is to recognize where my strengths and passions lie, and to subcontract out the things that I either don’t have the skills for, or the interest in doing. For this project that meant paint for the walls, finish on all of the cabinetry and furnishings, and upholstery for the banquette, the daybed, and the bench. The paint and the cabinetry finish was completed by Bob Realy, and the cushions were made and upholstered by Deborah Fisher.
The final parts to install were the window trim and the walnut ribbing that would cover up the seams in the paneled walls and ceiling. For these elements I fabricated strips of walnut 3/4” wide and 3/8” thick with an 1/8” radius on the edges. These pieces were substantial enough to hold the edges of the panels in place, but still thin enough that I could bend them around the curves in the ceiling. Once cut to length and scribed where necessary, they were held in place with decorative oval head screws.
Completion of the Airstream
After many many months of planning, obsessing, experimenting, building, worrying and working, the completed Airstream was finally ready for it’s debut. On a rainy October afternoon I watched it disappear down the road with a mixture of pride and relief. Had I known what I was getting myself into it’s possible that I would have turned the project down, but as T.S. Eliot memorably quipped: “If you aren’t in over your head, how do you know how tall you are?”, and now with some space and time between myself and the project, I am glad that I didn’t. The opportunity to collaborate with people as patient, enthusiastic and engaged as my clients were on this project is in itself a treat, but to do so on a something this unique and special was even more so.

Beautiful! Challenging work!